Home Assistant is home automation management software that offers great flexibility when it comes to managing our homes. Its multiple official and custom integrations allow us to connect a multitude of devices and services, but sometimes we find something we would like to integrate and there is no integration for it yet. In these cases, we can develop our own integration and even make it public so that other users can also benefit from it. Developing a Home Assistant integration is both simple and complex, or at least that is how it seems to me. The Home Assistant developers set strict rules to facilitate the development of custom integrations, but at the same time, I believe that these rules are not well explained in the documentation. That is why, through this tutorial, I will try to reflect everything I learned when I had to tackle this development for the first time. You can view all the code for this integration on my GitHub.
Creating an integration to check our public IP
Before we begin
To illustrate how to develop our first integration, we are going to develop one that allows us to have our public IP always updated as a Home Assistant sensor. To develop this application, we are going to use a community blueprint that will give us a solid foundation to start from. This blueprint is hosted at https://github.com/ludeeus/integration_blueprint and we can use it as a template by clicking on “Use this template.” We will create our repository with the name of our integration and clone the code to our PC. Therefore, the requirements to follow this tutorial are:
- GitHub: to use the template and host our code
- VS Code with the Dev Containers: highly recommended as the blueprint includes a configuration to run both our integration and the Home Assistant system itself within a development container. If you use VS Code, the Python integrations will also be necessary, and Ruff is highly recommended for formatting and linting.
When we open the project with VS Code and the Dev Containers extension installed, we will be prompted to reopen the project within the container itself.
Integration types in Home Assistant
When creating a Home Assistant integration, we need to understand the IoT class of our integration. The type we choose will describe how our integration will communicate. The following classes are used in Home Assistant:
- assumed_state: The status of the device cannot be obtained. The best we can do is assume the state based on our last command.
- cloud_polling: The integration of this device occurs through the cloud and requires an active internet connection. Checking the status means that an update may be noticed later.
- cloud_push: The integration of this device occurs through the cloud and requires an active internet connection. Home Assistant will be notified as soon as a new status is available.
- local_polling: Offers direct communication with the device. Checking the status means that an update may be noticed later.
- local_push: Offers direct communication with the device. Home Assistant will be notified as soon as a new status is available.
- calculated: The integration does not handle communication on its own, but provides a calculated result.
You can read more about IoT classes on the official_blog. We will use the class we need later on when configuring our integration, and although it may seem that it only describes how our integration will be, it also changes how we develop it; it is not the same to have to periodically update our service as it is to wait for Home Assistant to give us the command to make a modification. For this tutorial, as we want to obtain the public IP from time to time using an external service, we will use the cloud_polling class for that.
Configuration
The IoT class is just one of the settings we will need to modify from the blueprint for the integration to work properly, so let's see where we need to define these settings and which ones we need to change.
requirements.txt
The dependencies file contains only those necessary for development. Here, you will only need to modify it if you want to update Ruff, pip, or, most importantly, the version of Home Assistant that will be deployed in the development container. Normally, you would use the latest version available, but you must be careful if you use any features that are not available in previous versions, as users with older versions of Home Assistant may encounter problems. We will use the hacs.json file to minimize these problems.
README.md
As usual, this file contains information about the project and how to use it. Modify it to your liking.
LICENSE
This file contains the information about the copyright license you want to give to your project. By default, it comes with the MIT license, and since we are creating a derivative of this code, we must respect the original MIT license. To do this, we simply need to keep the license and add our name to it. For more information about licenses: https://choosealicense.com/.
custom_components/ha_public_ip/manifest.json
The last main configuration file we need to modify. It is located inside the folder with the name of our integration and, in turn, inside custom_components. It is important to respect this path naming convention so that we can easily install the integration through HACS later on. This file contains the basic information about our integration, such as the IoT class mentioned above. All the information in this file can be found in the documentation. This file should look like this:
{
    "domain": "public_ip",
    "name": "Public IP",
    "codeowners": [
        "@JoseRMorales"
    ],
    "config_flow": true,
    "documentation": "https://github.com/JoseRMorales/ha_public_ip",
    "integration_type": "service",
    "iot_class": "cloud_polling",
    "issue_tracker": "https://github.com/JoseRMorales/ha_public_ip/issues",
    "single_config_entry": true,
    "version": "0.1.0"
}
As you can see, it contains the domain, which is the unique identifier that references our integration (and matches the name of the folder within custom_components), the name of the integration, our GitHub user, the config_flow that indicates that it can be configured through the interface, the link to the documentation, integration_type that indicates the type of integration (in our case, service, since it does not represent a device), the IoT class explained at the beginning, the link to the issues section of our repository, single_config_entry, which indicates that only one entity can be configured for our integration (since in this case we only have one public IP per Home Assistant instance), and finally the version of the integration, which we will update as we resolve issues and add features.
Other files
The rest of the files that are not strictly related to the integration process do not need to be modified. They contain configurations for linter, Git, and GitHub. Take a look at them and customize them to your liking.
Developing our integration
Once the configurations have been made, it is time to address the logic of our code. As is usually the case in Python, we will begin with __init__.py. In this file, the first thing to note is the following code snippet:
PLATFORMS: list[Platform] = [
    Platform.SENSOR,
]
Here we will define what type of platforms our integration will use. These platforms can be sensors, lights, covers, etc. In our case, we will only need to use a simple sensor to store and keep a record of our IP. More information about the different platforms can be found on this documentation page.
Our integration entry point must also implement three functions that will allow us to load, unload, and reload the integration. Unloading and reloading do not require any further changes, but loading does. In the loading function, we will create the coordinator object, which is responsible for making requests to the API. A coordinator is used so that, when all entities consume from the same endpoint, the system is not overloaded with one request per entity. In our case, we will only have one entity, so the coordinator is not very important, but it will serve to organize the calls to the API. More information about the types of requests and the coordinator can be found here. Home Assistant will call a method of our coordinator every time it wants to update the data. We will see the class that defines our coordinator later. The time between calls to this method is defined with update_interval.
In addition to the coordinator, we create the object that contains the client that will be responsible for obtaining the IP information through an API. This client uses the asyncio session provided by Home Assistant, so we don't have to worry about creating the session. This object is stored in entry.runtime_data and will allow us to use it in the coordinator. Finally, all that remains is to load the data for the first time, load the platforms (which, as we defined above, only include the sensor), and add the listener for unloading the integration.
async def async_setup_entry(
    hass: HomeAssistant,
    entry: PublicDataConfigEntry,
) -> bool:
    """Set up this integration using UI."""
    coordinator = PublicIPDataUpdateCoordinator(
        hass=hass,
        logger=LOGGER,
        name=DOMAIN,
        update_interval=timedelta(minutes=5),
    )
    entry.runtime_data = PublicIPData(
        client=PublicIPClient(
            session=async_get_clientsession(hass),
        ),
        integration=async_get_loaded_integration(hass, entry.domain),
        coordinator=coordinator,
    )

    await coordinator.async_config_entry_first_refresh()

    await hass.config_entries.async_forward_entry_setups(entry, PLATFORMS)
    entry.async_on_unload(entry.add_update_listener(async_reload_entry))

    return True


async def async_unload_entry(
    hass: HomeAssistant,
    entry: PublicDataConfigEntry,
) -> bool:
    """Handle removal of an entry."""
    return await hass.config_entries.async_unload_platforms(entry, PLATFORMS)


async def async_reload_entry(
    hass: HomeAssistant,
    entry: PublicDataConfigEntry,
) -> None:
    """Reload config entry."""
    await hass.config_entries.async_reload(entry.entry_id)
We define the coordinator class in coordinator.py, which only contains the coordinator class with the _async_update_data method. This method is called by Home Assistant at the interval we defined, and through our client, will update the object with the data obtained from the API.
class PublicIPDataUpdateCoordinator(DataUpdateCoordinator):
    """Class to manage fetching data from the API."""

    config_entry: PublicDataConfigEntry

    async def _async_update_data(self) -> Any:
        """Update data via library."""
        try:
            return await self.config_entry.runtime_data.client.async_get_data()
        except PublicIPClientError as exception:
            raise UpdateFailed(exception) from exception
In data.py, we define the type of our ConfigEntry and its data. A ConfigEntry is basically a persistent object provided by Home Assistant to store our configurations. In this case, we use it to store both the client and the coordinator.
type PublicDataConfigEntry = ConfigEntry[PublicIPData]


@dataclass
class PublicIPData:
    """Data for the Public IP integration."""

    client: PublicIPClient
    coordinator: PublicIPDataUpdateCoordinator
    integration: Integration
To obtain information from the API, we have the api.py file. Before continuing with this section, I should clarify that there are two ways to call an API. We are going to define the library in a class within this same repository, which is the most common and simplest way for a custom integration, but Home Assistant recommends fetching data through a package published on Pypi. This way, you would keep isolated the package that is responsible for obtaining data from the device or service and is agnostic to the communication protocol, and you would only have to add that package as a dependency of the integration and make calls through this package (documentation).
class PublicIPClientError(Exception):
    """Exception to indicate a general API error."""


class PublicIPClientCommunicationError(
    PublicIPClientError,
):
    """Exception to indicate a communication error."""


class PublicIPClient:
    """Sample API Client."""

    def __init__(
        self,
        session: aiohttp.ClientSession,
    ) -> None:
        """Sample API Client."""
        self._session = session

    async def async_get_data(self) -> Any:
        """Get data from the API."""
        return await self._api_wrapper(method="get", url="https://ifconfig.me/ip")

    async def _api_wrapper(
        self,
        method: str,
        url: str,
        data: dict | None = None,
        headers: dict | None = None,
    ) -> Any:
        """Get information from the API."""
        try:
            async with async_timeout.timeout(10):
                response = await self._session.request(
                    method=method,
                    url=url,
                    headers=headers,
                    json=data,
                )
                return await response.text()

        except TimeoutError as exception:
            msg = f"Timeout error fetching information - {exception}"
            raise PublicIPClientCommunicationError(
                msg,
            ) from exception
        except (aiohttp.ClientError, socket.gaierror) as exception:
            msg = f"Error fetching information - {exception}"
            raise PublicIPClientCommunicationError(
                msg,
            ) from exception
        except Exception as exception:
            msg = f"Something really wrong happened! - {exception}"
            raise PublicIPClientError(
                msg,
            ) from exception
For this integration, the api.py library is very simple. We define the exceptions and, through a simple wrapper, we obtain the necessary data. To obtain our public IP, the coordinator simply calls async_get_data and makes the request to the API (in this case, ifconfig.me).
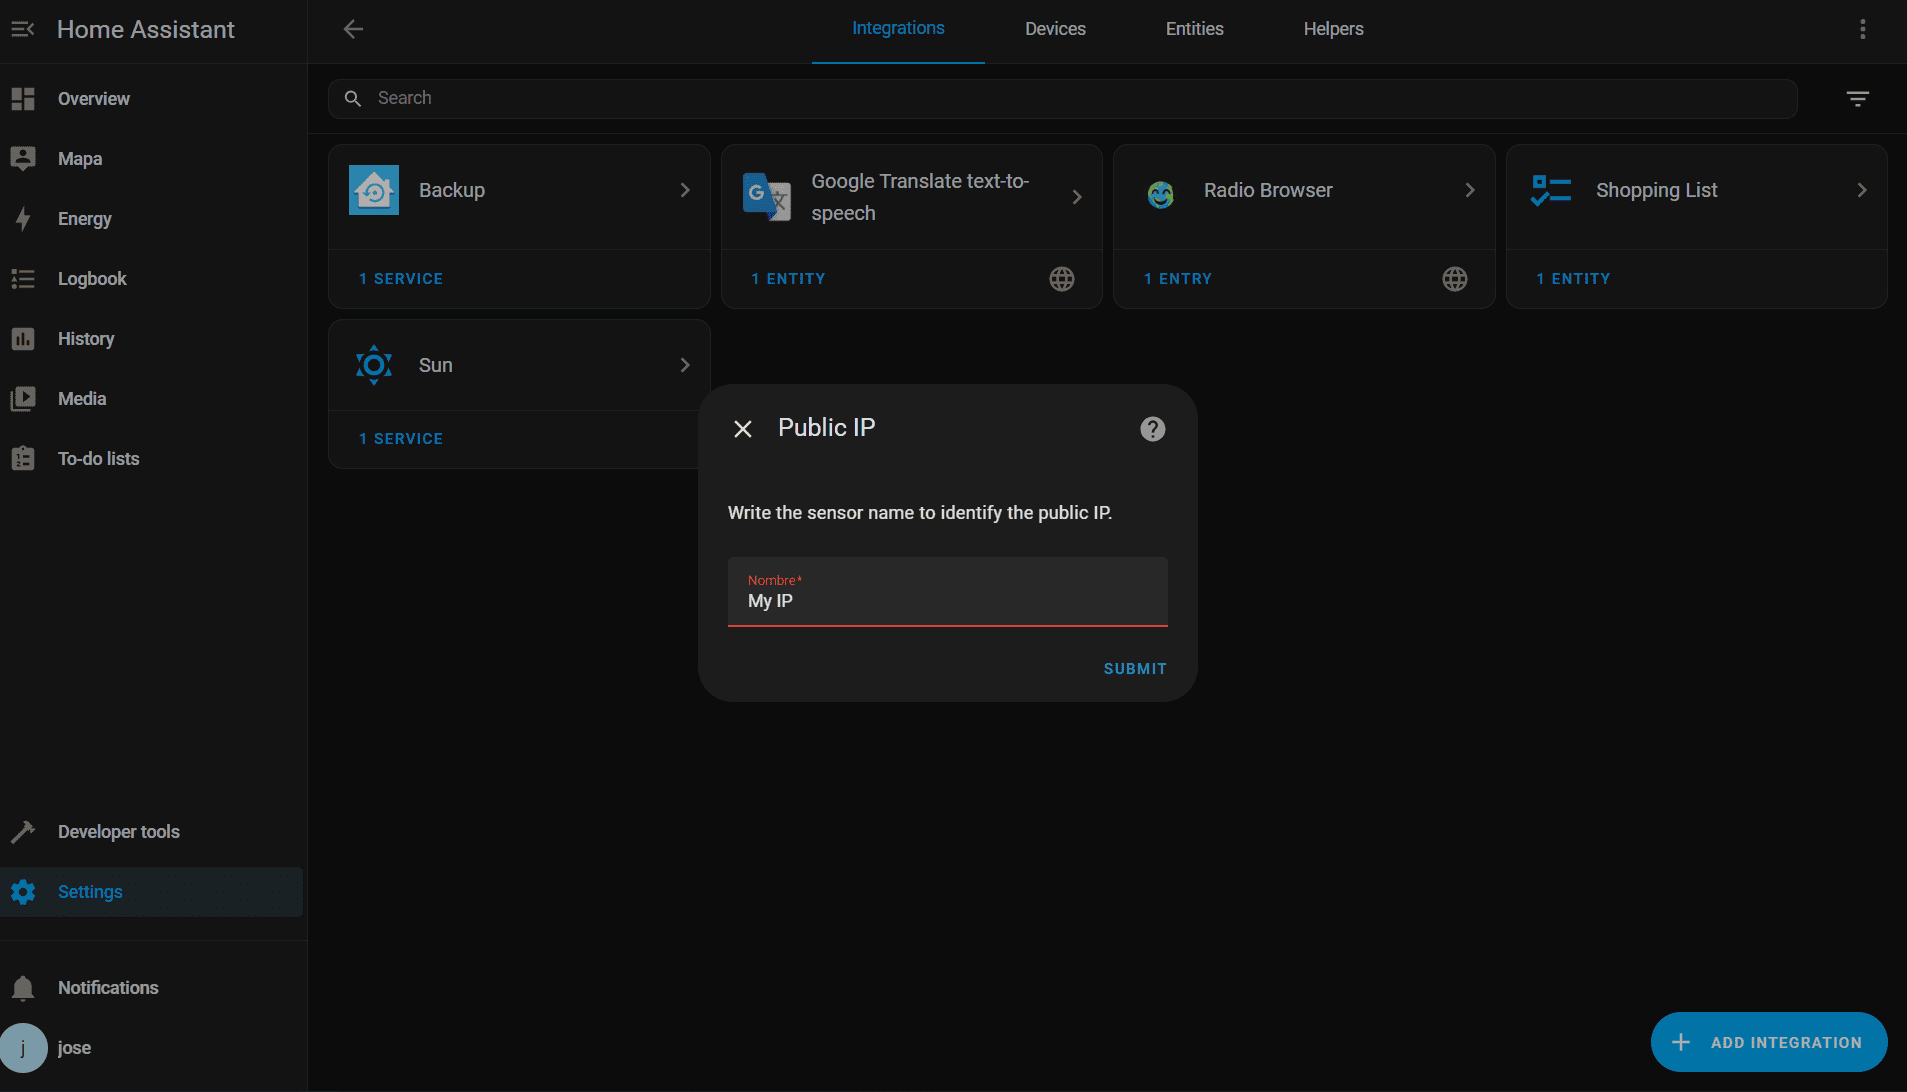
Before developing the sensor that will ultimately display this information in Home Assistant, we must configure config_flow.py. This file ensures that you can configure an integration through the interface. In our case, it is not really necessary because we do not need any user input. Normally, credentials are required to connect to the API, but it is not necessary in this case. Even so, to show how it is used, we will use this flow to ask the user what name they want to give to the sensor that will store the IP.
class ConfigFlowHandler(config_entries.ConfigFlow, domain=DOMAIN):
    """Config flow for Public API."""

    VERSION = 1

    async def async_step_user(
        self,
        user_input: dict | None = None,
    ) -> config_entries.ConfigFlowResult:
        """Handle a flow initialized by the user."""
        _errors = {}
        if user_input is not None:
            try:
                await self._test_connection()
            except PublicIPClientCommunicationError as exception:
                LOGGER.error(exception)
                _errors["base"] = "connection"
            except PublicIPClientError as exception:
                LOGGER.exception(exception)
                _errors["base"] = "unknown"
            else:
                return self.async_create_entry(
                    title=user_input[CONF_NAME],
                    data=user_input,
                )

        return self.async_show_form(
            step_id="user",
            data_schema=vol.Schema(
                {
                    vol.Required(
                        CONF_NAME,
                        default=(user_input or {}).get(CONF_NAME, vol.UNDEFINED),
                    ): selector.TextSelector(
                        selector.TextSelectorConfig(
                            type=selector.TextSelectorType.TEXT,
                        ),
                    ),
                },
            ),
            errors=_errors,
        )

    async def _test_connection(self) -> None:
        """Validate connection."""
        client = PublicIPClient(
            session=async_create_clientsession(self.hass),
        )
        await client.async_get_data()
For this integration, the flow is not very complex, but it can easily become complicated if we require a lot of user data and checks. ConfigFlows are configured through a handler class and steps. We can request user information in several steps. For example, we can first ask for the country and, depending on the input, request credentials for one region or another. For our integration, we will only ask for the name of the sensor. The form that the user must fill out is validated through the voluptuous validation library. For each step of the configuration, there are several paths: if the user has not entered the data, the form with the entries of the type we need is displayed; if the user has entered the data, it is validated and the entities are created; and if there has been a validation or connection problem, the error is displayed.
For the texts to be displayed to the user and the constants to be used, we have several files. const.py has the domain definition that uniquely identifies our integration, other constants that identify the translations found in the translations folder and the logger definition.
LOGGER: Logger = getLogger(__package__)

DOMAIN = "public_ip"
CONF_NAME = "name"
Each language we need to support must have a json file with the corresponding language code in the file name.
{
    "config": {
        "step": {
            "user": {
                "description": "Write the sensor name to identify the public IP.",
                "data": {
                    "name": "Nombre"
                }
            }
        },
        "error": {
            "connection": "Unable to connect to the server.",
            "unknown": "Unknown error occurred."
        },
        "abort": {
            "already_configured": "This entry is already configured."
        }
    }
}
Note how the configuration texts are defined here and the name of each step (only one in our case) corresponds to the id we give it in the config flow.
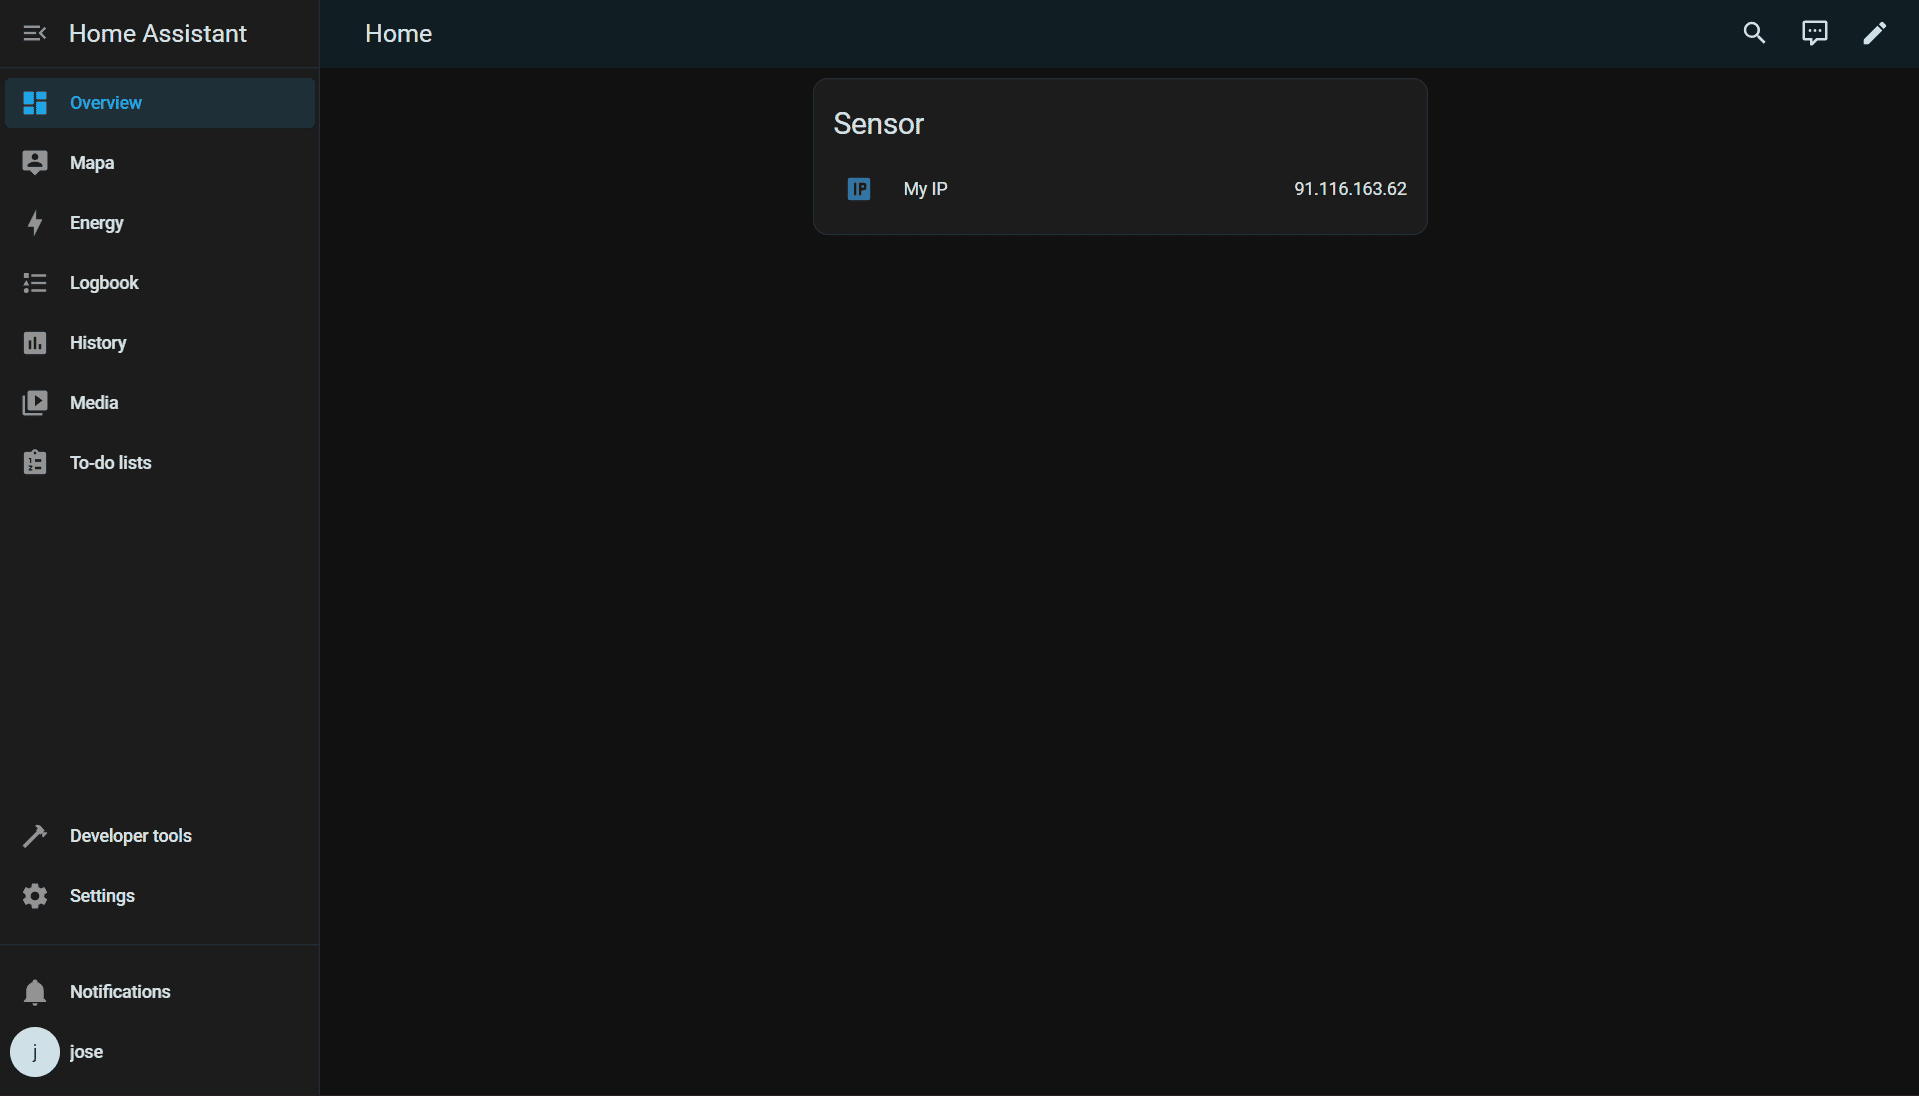
Now we just need to bring our sensor to life, which is what we will actually see in Home Assistant and can be used for our dashboards and automations.
ENTITY_DESCRIPTIONS = (
    SensorEntityDescription(
        key="public_ip",
        icon="mdi:ip",
    ),
)


async def async_setup_entry(
    hass: HomeAssistant,  # noqa: ARG001 Unused function argument: `hass`
    entry: PublicDataConfigEntry,
    async_add_entities: AddEntitiesCallback,
) -> None:
    """Set up the sensor platform."""
    async_add_entities(
        PublicIPSensor(
            title=entry.title,
            coordinator=entry.runtime_data.coordinator,
            entity_description=entity_description,
        )
        for entity_description in ENTITY_DESCRIPTIONS
    )


class PublicIPSensor(PublicIPEntity, SensorEntity):
    """Public IP Sensor class."""

    def __init__(
        self,
        title: str,
        coordinator: PublicIPDataUpdateCoordinator,
        entity_description: SensorEntityDescription,
    ) -> None:
        """Initialize the sensor class."""
        super().__init__(coordinator)
        self._attr_name = f"{title}"
        self.entity_id = ENTITY_ID_FORMAT.format(f"{DOMAIN}_{title}")
        self.entity_description = entity_description

    @property
    def native_value(self) -> str | None:
        """Return the native value of the sensor."""
        return self.coordinator.data
As we saw in the configuration, when it was created correctly, the async_setup_entry method was called. This method is implemented by each platform that we have declared in our integration. In this method, all entities of the sensor type (only one in this case) are added through the declaration of the classes. Our sensor class contains data to define the entity and uses the title we asked the user for, both for the name and the id. And obviously, it has the native_value property, which is what Home Assistant reads and shows to the user. This property obtains the information from the data obtained by our coordinator.
Finally, only the entity.py file remains.
class PublicIPEntity(CoordinatorEntity[PublicIPDataUpdateCoordinator]):
    """Public IP entity class."""

    def __init__(self, coordinator: PublicIPDataUpdateCoordinator) -> None:
        """Initialize."""
        super().__init__(coordinator)
        self._attr_unique_id = coordinator.config_entry.entry_id
Here, we simply define the class that our sensors implement. In this case, the class is very simple and only implements the definition of unique_id, but as we add entities, it can be useful to avoid repeating code.
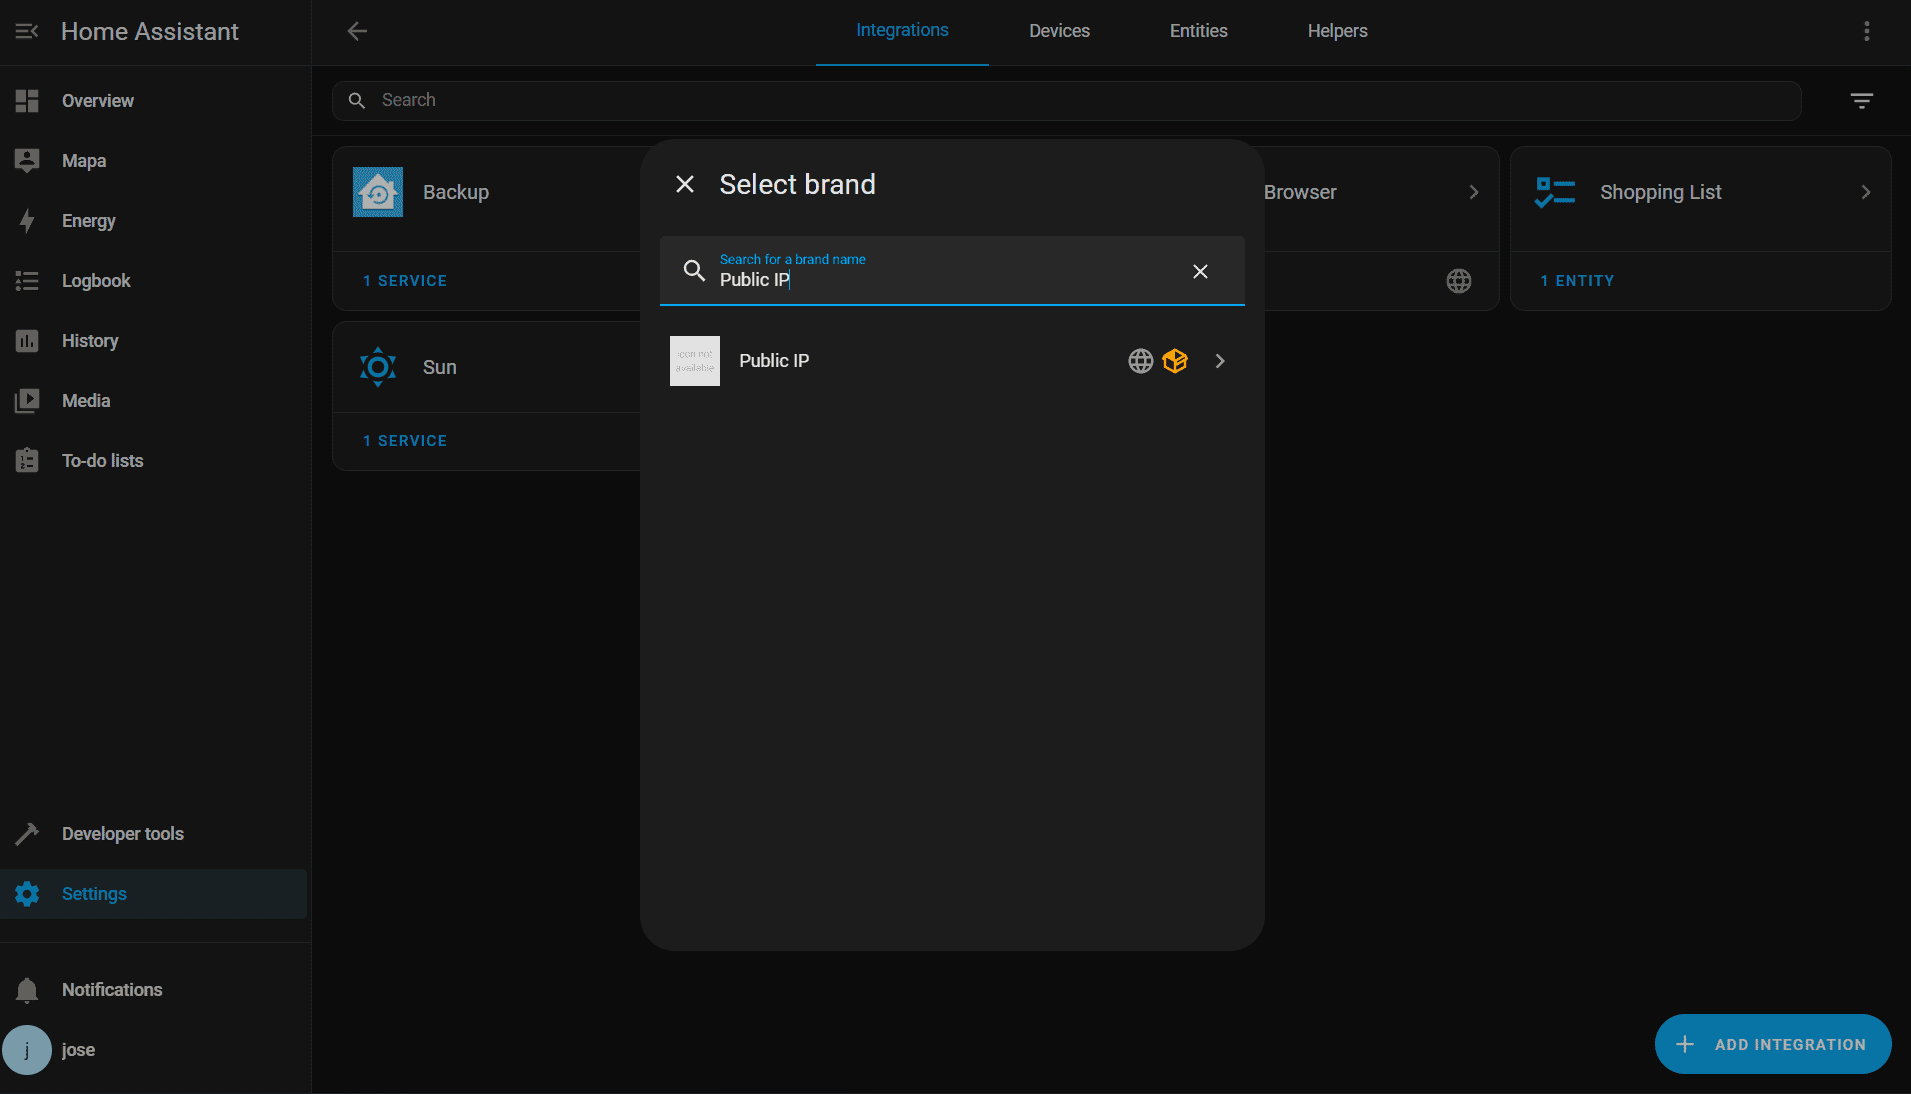
With this, we can now test the integration. To do so, if we are inside the Dev Container, we run bash scripts/develop, and an instance of Home Assistant with the integration installed will be executed. We will just have to add the integration and start testing it.
The logo for our integration can be configured, but it is not a simple process. You must add the files corresponding to the logos you want to display in the Home Assistant brands repository by creating a Pull Request.
Publishing the integration
The repository contains several workflows to validate the integration once we upload our code to GitHub. It is highly recommended to take a look at the files in the .github folder where these workflows are located, as there are also template files in case any user needs to report an error or contribute to the repository.
In addition to the workflows that come with the blueprint, you may want to add the following workflow, which will create a release with the appropriate changelog each time you push a tag. Thus, when HACS updates the repository information and after the manifest.json file is updated with the appropriate version, it will show the user that an update is available, with the version duly displayed along with the list of changes made.
name: Create Release

on:
  push:
    tags:
      - 'v*'

jobs:
  create-release:
    runs-on: ubuntu-latest
    permissions:
      contents: write

    steps:
    - name: Checkout code
      uses: actions/checkout@v4
      with:
        fetch-depth: 0

    - name: Extract tag name
      id: tag
      run: echo "tag=${GITHUB_REF#refs/*/}" >> $GITHUB_OUTPUT

    - name: Generate changelog
      id: changelog
      run: |
        # Get the previous tag
        PREVIOUS_TAG=$(git describe --tags --abbrev=0 HEAD~1 2>/dev/null || echo "")

        if [ -z "$PREVIOUS_TAG" ]; then
          # If no previous tag, get all commits
          CHANGELOG=$(git log --pretty=format:"- %s (%h)" --no-merges)
        else
          # Get commits since the previous tag
          CHANGELOG=$(git log --pretty=format:"- %s (%h)" --no-merges ${PREVIOUS_TAG}..HEAD)
        fi

        # Save changelog to output (escape newlines for GitHub Actions)
        echo "changelog<<EOF" >> $GITHUB_OUTPUT
        echo "$CHANGELOG" >> $GITHUB_OUTPUT
        echo "EOF" >> $GITHUB_OUTPUT

    - name: Create Release
      uses: actions/create-release@v1
      env:
        GITHUB_TOKEN: ${{ secrets.GITHUB_TOKEN }}
      with:
        tag_name: ${{ steps.tag.outputs.tag }}
        release_name: Release ${{ steps.tag.outputs.tag }}
        body: |
          ## Changes in this release

          ${{ steps.changelog.outputs.changelog }}

          **Full Changelog**: https://github.com/${{ github.repository }}/compare/${{ steps.tag.outputs.tag }}...HEAD
        draft: false
        prerelease: false
The workflow validation checks that our repository is correct, so if you see that it fails, check the log since something may be missing (the description, issue configuration, etc.).
Now all that remains is to show the installation instructions in the README. To install it, we can add the repository to HACS or simply create a special link that does it for us and add it to the README.
[](https://my.home-assistant.io/redirect/hacs_repository/?owner=JoseRMorales&category=Integration&repository=ha_public_ip)Adding custom integrations with this button is very simple, but if you still want to publish the integration in the official HACS repository, you must follow these instructions.
And with that, we have created our first simple integration. From here, the possibilities are endless, so go ahead and develop them.